
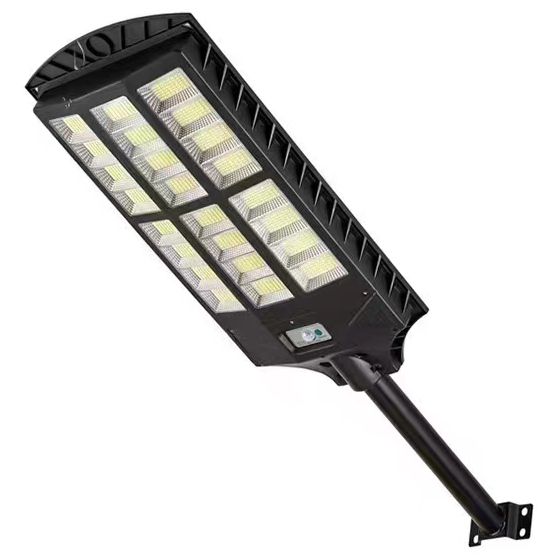
I will never forget my first attempt at lighting my back garden about twelve years ago. I went to a big-box store and bought a dozen cheap plastic stake lights and spent an afternoon pushing them into the ground as I felt the satisfaction of a new eco-friendly project. But when the first autumn heavy rain hit, half of the lights fogged up and half of them went as dim as a firefly that has had a long day. I had to pull them all out, and I wasted plastic and money. I have replaced plastic models for a clients garden as one rainy winter turned a ‘budget’ garden into a graveyard of dead electronics.
Let’s take a look at 2026 and how the world of rechargeable solar lights is looking. It is more than just small glowing lights now. We have high-performance solar lights that can replace traditional wired lights. With the current technologies we have available lithium iron phosphate batteries and ultra-efficient monocrystalline solar light charging panels, outdoor lighting can now be bright and reliable without touching wired electricity.
With rechargeable solar lights, aesthetics is only one consideration. It is also important to choose the best light harvesting system that can efficiently and effectively capture light even in the cloudy days and is rugged enough to stand the test of time. It is important in light of the rising cost of utilities. Homes are now designed to be safe and welcoming without the burden of maintaining hazards of old halogen lighting systems.
The Modern Solar Lights have many advantages:
- Operating costs are 0 dollars because once they are in the ground the sun funds the lights.
- Because they are not connected to a power grid, the lights are still operational even when there is a blackout.
- No need for mess in the garden for digging or electric trampling. It is a rapid deployment for DIY.
- Eco-Conscious Living: You’re actually harvesting the sky to illuminate your evenings.
What are Recharge Solar Lights, and How Do They Work?
The first time you see recharge solar lights, you may think it is magic. The sun goes down, and the lights come on. However, solar lights are actually very simple. They consist of 4 main components: a solar panel, battery, some LED lights, and a small controller.
The solar panel creates direct current (DC) electricity by converting sunlight (photons). The controller sends the stored energy to the LEDs.
After years of experience, I can say that the true hero of the system is the “controller.” In 2026, smart MPPT (or maximum power point tracking) has become the new standard for top tier units. This is the brain that allows batteries to recharge solar lights even during overcast days. This is what makes the premium solar garden lights collection stand out against the cheap supermarket versions, they are made to take every ounce of power from the sky during cloudy days as opposed to using ineffective methods.
Advantages of Using Rechargeable Solar Lights
Everytime a friend comments about removing the old wired flood lights in trade for new recharge solar lights, the first the thing I say is that they will get to experience true freedom from the system. Here are the reasons why I go to bat for solar lights:
- No Digging or Wiring: Traditional outdoor lights are a pain in the ass as they require the contractor to dig a trench to put in an electrical line, which they will charge you a lot of money for, and also ruin your grass. All you need to do with a solar light is put in a stake, or a couple of screws, and you are done!
- Safe for Pets and Kids: You will no longer have to worry about the dog chewing on or the gardener accidentally cutting a high-voltage wire that is in the ground. These are low-voltage and self-contained, which makes them completely safe.
- Automatic Intelligence: Many units we recommend at ralighting have built-in motion detectors or dusk-to-dawn timers. They know when to work, so you don’t have to remember to flip a switch!
- Design Flexibility: You can place the lights wherever you need them, rather than just where the nearest outlet is. If you want a light on a tree at the far end of your yard, your only feasible option is a recharge solar lights unit.
Top Features to Consider in 2026
If you’re searching for some new gear, avoid the shiny marketing. After 10 years of experience in the field, these are the specifications I believe will determine how satisfied you will be in two years:
Battery Chemistry (LiFePO4)
In 2026, I suggest buying only Lithium Iron Phosphate (LiFePO4) batteries. They are better with heat, they charge faster, and can be charged over 2000 times. They can last 7-10 years, and with cheaper Ni-MH batteries, they usually die in 18 months.
IP rating (Weatherproof)
Look for an IP65 or IP67 rating. This means that the unit is totally protected against dust and can withstand rain, snow, and even some water. I have seen IP44 lights fail after one humid summer, don’t make that mistake.
Smart Technology
Look for “Dual-Mode” sensors. With this feature, the light stays at a dim 20% brightness for ambiance, but then jumps to 100% when it detects motion. This is a game-changer in terms of battery saving for the short days of winter.
Varieties and Styles of Rechargeable Solar Lights
Choosing the correct style is about aligning the light’s “mission” with your yard. Here’s the breakdown:
1. Stake Lights: These are classic “stick in the ground”. They are best for flower beds and bordering soft edged paths in the garden. Pros: They are the easiest to install. Cons: They can get knocked over by lawnmowers.
2. Bollard Lights: These are a bit more durable, post style lights. I typically prefer these for modern driveways. Our collection of bollard solar lights provides a cleaner and more architectural style.
3. Wall-Mounted Security Lights: These lights can have different features such as motion sensors. Because of this, they are very useful for side yards and garage entrances.
4. Spotlights: These are best used for lighting trees, flags, or other structures. Most have a separate solar panel so that you can place the light in the shade and the panel in the sun for optimal charging.
5. Step & Deck Lights: These are essential for being low profile, and safety. These units are installed into the vertical part of a stair.
Our Favorite 8 Rechargeable Solar Lights
These lights have been tested in both the severe Colorado winters and the extreme Florida summers and they are still standing strong.
– The Titan 1000 Pro (/product/titan-1000-solar-spotlight)
– Most Ideal For: Large driveways and security
– Specs: 1000 lumens, LiFePO4 battery with a separate solar panel.
– Expert Opinion: This is the strongest unit we have. It is too much for a small patio, but for a 50 foot driveway, it is perfect.
– The Heritage Bollard Gen-3 (/product/heritage-bollard-3)
– Most Ideal For: Classy front walkways
– Specs: 300 lumens, warm white aluminum.
– Expert Opinion: I love the weight of these. They don’t feel like toys.
– Slimline Deck Marker (/product/slimline-deck-light)
– Most Ideal For: Stairs and wood decks
– Specs: 50 lumens and a waterproof IP68 rating.
• The Scout Wall Security (/product/scout-motion-light)
◦ Best Optimal Use: Best Optimal Use: Side doors and sheds.
◦ Specs: Motion-activated, 800 Lumens,
• Aurora Color-Change Spotlight (/product/aurora-rgb-solar)
◦ Best Optimal Use: Fun garden accents.
◦ Specs: Remote controlled, 7 color modes.
• The Pathfinder Stake (/product/pathfinder-solar-stake)
◦ Best Optimal Use: Economical path lining.
◦ Specs: This high-lumen model- 300 lumens at compact stake size.
• Modern Glass Brick (/product/solar-glass-brick)
◦ Best Optimal Use: Paver patios.
◦ Specs: Flush mount, walk-over safe.
• Edison-Style String Lights (/product/solar-edison-strings)
◦ Best Optimal Use: Pergolas and outdoor dining.
◦ Specs: 30 feet of shatterproof bulbs.
Step-by-Step Installing + Mistakes
Want to install a recharge solar light system? This is your time to shine! This is the best Saturday project ever, and with just a screwdriver and a cold drink, you’re 90% there!
Now, the steps:
1. The “Pre-Flight” Charge: Prior to placing the lights in the ground, turn the lights to “OFF” and let the batteries soak in the sunlight fully for 24 hours (you must also do this in order for the solar lights to turn ON for the first time).
2. The Sunlight Audit: Walk your yard at 2:00 PM to see if there are any trees or rooftops that would cast a shadow across the lights. If there are, the tops of the lights may not fully recharge. You need to aim for a 6-hour direct sunlight exposure if you want the lights to work at night.
3. Work on the Soil: If it’s hard clay, don’t try to shove the stake in. You will break the plastic. Instead, use a screwdriver to make a pilot hole first.
4. Tilt the Panel: If you have wall mounted units, try to tilt the panel to the south (if in the Northern Hemisphere). A tilt of even 15 degrees can improve charging by 20%.
Things I’ve Noticed:
• Shadow Trap: People installing a light right under a deep evergreen tree because it looks nice. Bad idea. The light won’t have the juice to run all night.
• Competing Light: If you put your solar light right by a bright porch light, the sensor might think it’s daylight and not turn on.
• Snow: In winter, a couple inches of snow and your light will stop charging. Keep snow off the light.
How to keep your outdoor solar lights out of the landfill for 7-10+ years I’d hate to see good hardware go to the landfill. If you take care of your outdoor solar lights, I will be happy to see good hardware go to the landfill once the useable life of the lights is up.
• Clean every 6 months: Bird droppings, dust, and pollen can diminish how much energy your solar lights can collect. Every six months, use a cloth and carefully wipe the solar collecters. It can help collect a lot more energy and allows for more effective recharging.
• Battery Replacement: If the lights switch off after only 3-4 hours, do not throw them away. If defective, the LiFePO4 battery can be replaced in under 2 minutes and costs under 15 dollars.
• Winter Care: If the snow in your area reaches 5 foot drifts, I would recommend bringing your stake lights inside for winter. However, the wall-mounted lights can stay mounted, but make sure to prevent ice buildup.
• Inspect Bug Seals: Every year, remove the cover and check for bugs. If there is a web inside the case, it can cause issues with the sensor.
Real Costs and Payback Period
Now let’s talk about numbers. A typical solar light costs approximately 40 dollars and a halogen light costs 15 dollars. Many people buy them assuming it is a cheaper option because they do not take the \”hidden\” costs into account.Traditional wired setup (6 lights)
6 fixtures: $90
100 ft Conduit & Wire: $120
Outdoor transformer: $150
Licensed electrician (3 hours): $450
Upfront total: $810
Annual electricity cost: ~45$
Premium solar setup (6 lights from ralighting)
6 Pathfinder Bollards: $360
Installation: $0 (DIY)
Electricity: $0
Upfront total: $360
Over the first day alone, you’re saving $450. Over the course of 5 years, considering the electricity you didn’t have to pay, you’ve saved almost $700. That’s the \”Solar Payback\” in action.
Solar vs traditional wired lights: Quick comparison
Why choose recharge solar lights in 2026?
Recharge solar lights have finally hit the point where there’s no compromise. Brightness, durability, and style to match any wired system. They’ve come a long way. I’ve spent 10 years watching people transform their backyard from dark and unsafe to warm and inviting in just a single day.
At ralighting, we don’t believe in disposables. Our eco-friendly pathway lighting withstands rain and heat while standing the test of time. With high-lumen, LiFePO4-powered systems, we not only save you money by making a smart investment in your home’s safety, we also turn dangerous walkways and dark patios into beautiful outdoor rooms.
It’s time to stop letting your home’s exterior go dark! Visit our website, and look through our collection. We’ve gone through every model we sell, so let us know if you have questions! Stop paying for electricity and start using the sun, We are The Bright Side of Sustainable. Visit our whole collection of rechargeable solar lights to brighten your outdoors.
Common Questions
Q: Do solar lights work in winter and cloudy days?
A: Yes. To ensure lights stay on for short periods of time during the winter months, modern solar lights can partially charge and stay on for extra short periods of time. They will light up essential safety lights during the entire time during winter days. If snow is clearing the panels don’t forget to.
Q: How long do LEDs lights last?
A: Our units have LEDs that last for approximately 50,000 hours. That means that for an average of 10 hours of use per day, that would total to 13 years.
Q: Is it possible to install these in my yard if it is shady?
A: It is possible and depends on area that is shady. If there is an area that gets indirect light for 4 hours, then most high-lumen models will work. If it is an area in full shade and without sunlight, then it is recommended to use models that have a “split” panel so that there can be a panel is in the sunny position.
Q: What should I do my area in hail?
A: Our models are premium, and use tempered or high impact plexi glass so that it can endure 1 inch of hail. I have seen premium models withstand rough storms, where the dents of the storms belong on car.
Q: Can I replace the batteries?
A: Yes! In our premium models, it is possible. We believe in sustainability, and instead of replacing the entire fixture, we make replacing the battery easier.
Q: Will the light suit my other outdoor lights?
A: We have most of our lights in “Warm White” (approximately 3000K), which imitates old-fashioned bulbs. We also have “Cool White” for modern, blue-whitish look. See the product details for the “Color Temperature”.